This section will take you through a step-by-step guide on how-to set up your Email Account on Microsoft Outlook 365. Again, the configuration is very similar to Microsoft Outlook 2016/2019, with minor UI differences.
Note: We will be configuring the email account using SSL Hostnames for SMTP and IMAP protocols.

Setup email address on desktop client
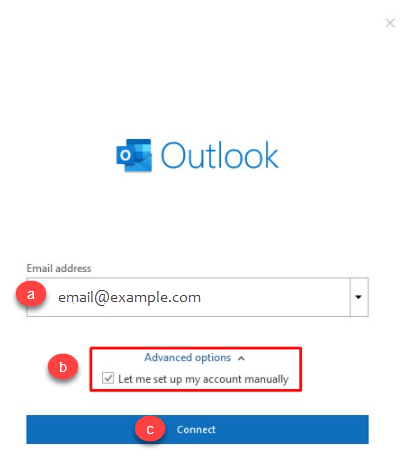
1. Launch Microsoft Outlook on your computer. If you are launching it for the first time, you will directly see the window as shown below. If you have already configured some other email accounts on Outlook, you can click on File Menu > Add Account to see the window as shown below.
a. Enter your Email Address.
b. Check the box that reads, Let me set up my account manually.
c. Click on Connect.
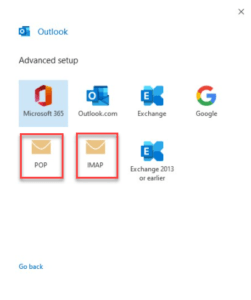
2. Select POP or IMAP depending upon the Incoming Protocol you prefer. In this article, we have selected IMAP.
3. Refer to the Email Client Settings below, and based on your preferences, enter the respective hostnames, port numbers, and encryption methods for the Incoming Mail and Outgoing Mail servers. Then click on Next.
| SSL Email Port Settings | ||
| Outgoing Server SMTP | mail.domainname.com | Port 26/587 |
| Incoming Server IMAP | mail.domainname.com | Port 993 |
| Incoming Server POP | mail.domainname.com | Port 995 |
| Non-SSL Email Port Settings | ||
| Outgoing Server SMTP | mail.domainname.com | Port 25/587 |
| Incoming Server IMAP | mail.domainname.com | Port 143 |
| Incoming Server POP | mail.domainname.com | Port 110 |
Note: The domainname.com in the above example needs to be replaced with your actual domain name.

4. Enter the password for your email account with us and click on Connect.


Your email account has been configured successfully! Click on Done to conclude the process.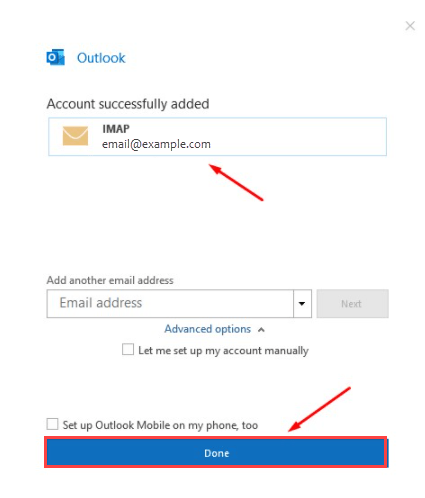
You can now send and receive emails from your Email Client.