CONOCIDOS · SERVICIOS DEDICAADOS " VPS
Generar una solicitud de firma de certificados (CSR) en Windows IIS 10
Última actualización 2024-03-27
Este cómo-para le paso a través de la generación de una solicitud de firma de certificados (CSR) en IIS. Estos procedimientos se probaron en Windows 10 en IIS 10, pero también trabajarán en IIS 7.x y 8.x.
- Comienza el Administrador IIS.
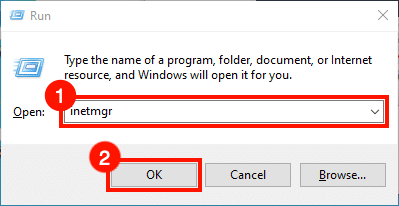
Iniciar la acción;IIS ManagerUna manera rápida de hacer esto es abriendo el ritmo;Corre" , después de escribir "nbsp";
inetmgry haciendo clic en el botón izquierdo;OKAbsp;button. - Seleccione servidor.
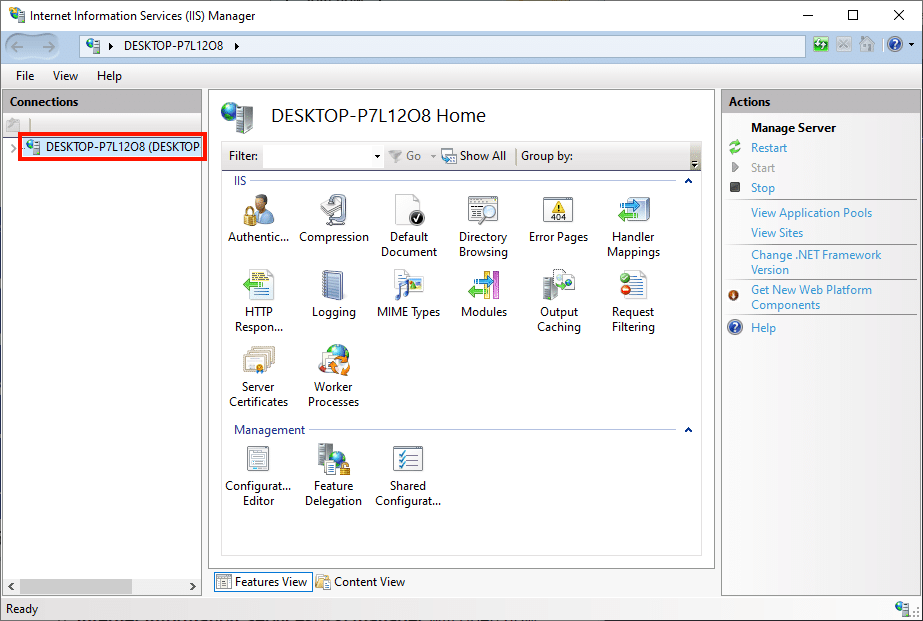
Seleccione el servidor en el pacientenbsp;Conexiones& nbsp;pane, en el lado izquierdo de la ventana.
- Certificados de Servidor Abierto.
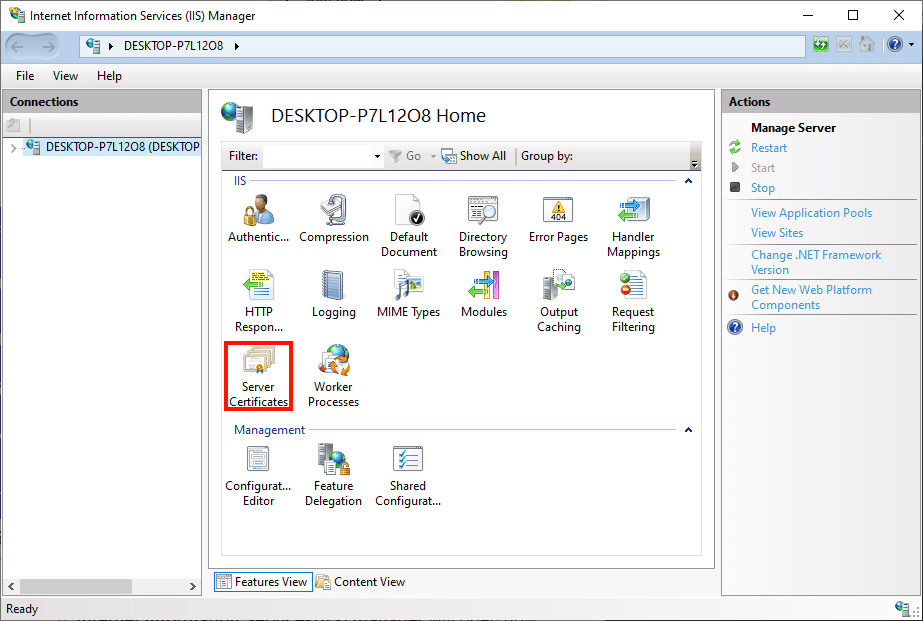
Haga doble clic en el botón izquierdo;Certificados de servidor" Nbsp;icon, ubicado bajo el punto de vista;IIS& nbsp; en el panel central de la ventana.
- Haga clic en "ldquo;Crear la solicitud de certificado.
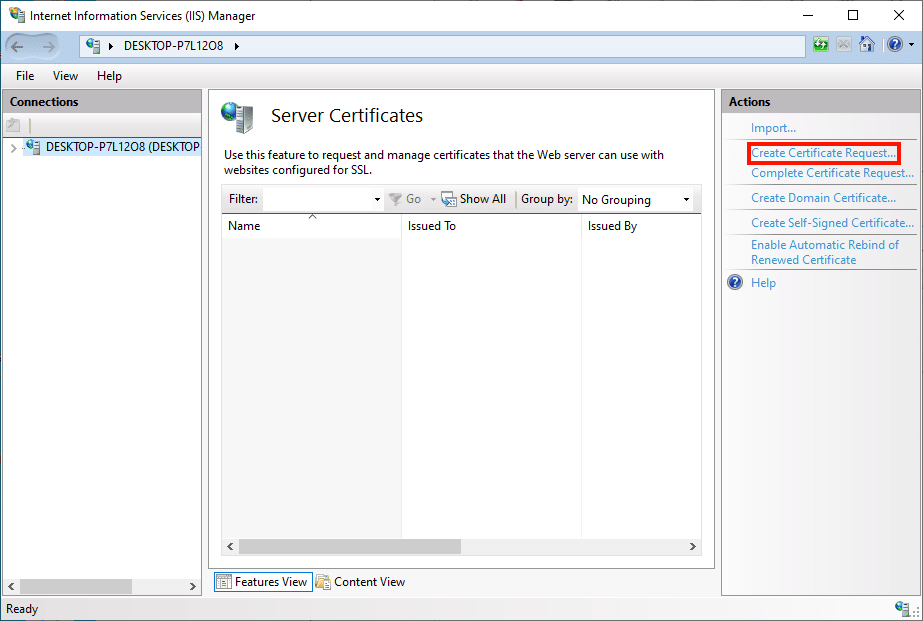
Haga clic en el botón .Crear solicitud de certificados" Nbsp;link, in the limitnbsp;Acciones& nbsp;pane en el lado derecho de la ventana.
- Introduzca Propiedades de nombre distinguido.
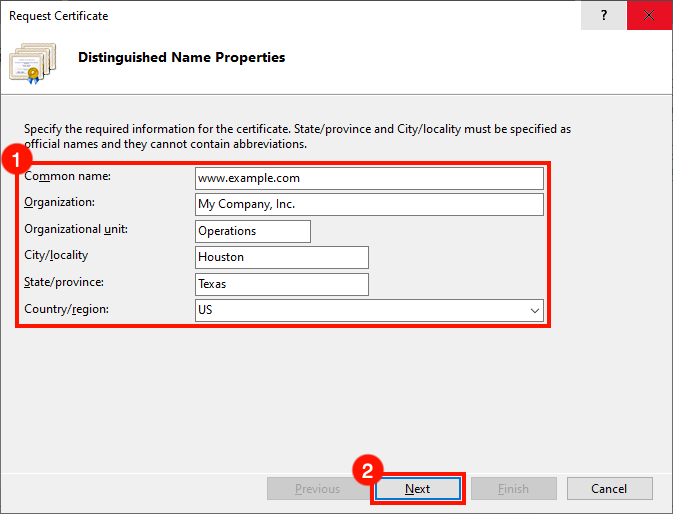
El grupo de personas;Solicitud de certificado& nbsp;wizard abrirá. Llenar el pañuelo;Propiedades de nombre distinguido forme con la siguiente información:
" Bull;Nombre común:& nbsp ; El nombre de host que utilizará el certificado. Esto suele ser un reflejo;nombre de dominio totalmente calificado, como "condensp"www.mydomain.com, o провов;store.mydomain.com. También puede utilizar un comodín, como “dunbsp”;*.mydomain.com.
" Bull "nbsp;Organización:El nombre legal de su empresa o organización.
" Bull;Ciudad/localidad:& nbsp ; La ciudad donde se encuentra su empresa.
" Bull "nbsp;Estado/provincia:& nbsp ; El estado donde se encuentra su empresa.
" Bull "nbsp;País/región:" nbsp; Use el términonbsp;abreviatura de dos caracteres& nbsp; para su país.
Cuando termines de rellenar el formulario, haz clic en el botón "Calmbsp";SiguienteAbsp;button. - Establecer Propiedades de proveedor de servicios críptos.
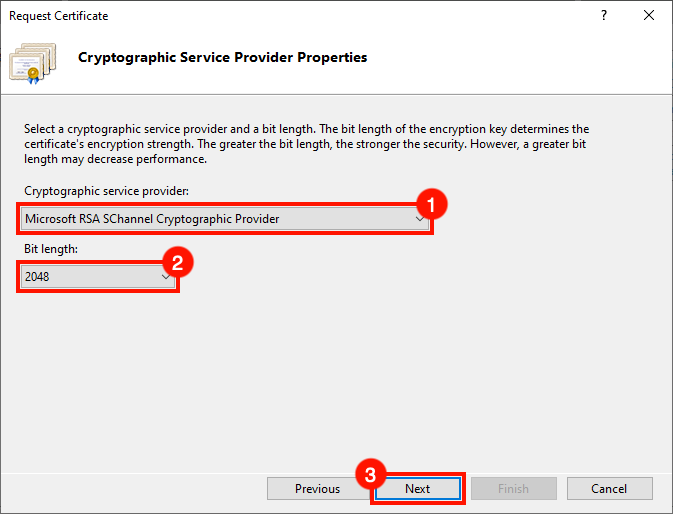
Siguiente, establecer el нелитов;Propiedades de proveedores de servicios ciptoggráficos. Utilice los menús desplegables para seleccionar
Microsoft RSA SChannel Cryptographic Provider" nbsp;as the limitnbsp;proveedor de servicios criptográficos, y un poco de longitud de corpiño;2048< nbsp; (a menos que tenga una razón para establecer estos a otros valores). Cuando termines, haz clic en el botón izquierdo;SiguienteAbsp;button. - Crear nombre de archivo y terminar.
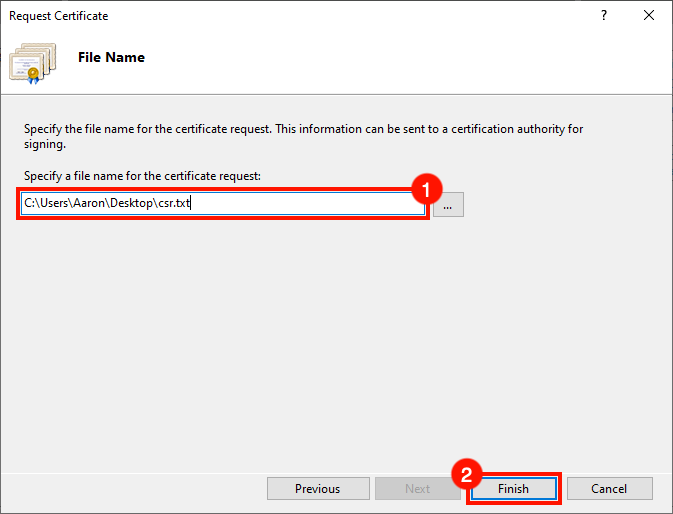
Crear un nombre de archivo para su RSC, luego haga clic en el botón "AcabadoAbsp;button.
- Siguientes pasos.
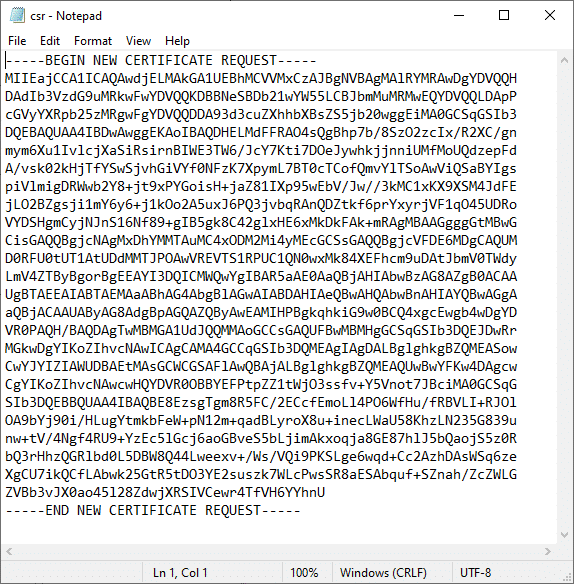
¡Ustedes están acabados! Abra la RSC en un editor de texto cuando esté listo para enviarla a SSL.com para firmar. Para instrucciones sobre la presentación de su RSC a SSL.com, lea nuestro punto de vista;guía de la presentación de la RSC. Cuando usted queda consiguiente; está listo para instalar su certificado, por favor vea estos how-tos en el punto de contacto;instalación" Nbsp; y Cónbsp;vinculante" Nbsp;in IIS.
nbsp;
Díganos qué tiene que estar levantado.
Una breve conversación con un ingeniero. Sin cita-bot, sin cola de callback.