Evaluate your Site
The first thing you’ll want to do is evaluate your site. You’ll want to find out where in your previous host which folder your website files are stored. You will also want to find out if you are using any databases, and if so, how you can obtain a backup of them. It is best to contact your current hosting company to obtain this information as it does vary from web host to web host.
Download your Website Files
Next, you’ll want to download your website files from your previous host to your desktop. We recommend that you use FTP to perform this step. For more help with using FTP, please see the following link:
Getting Started Guide: FTP
Export your Website Databases
If your website uses databases, you’ll want to obtain a backup of your databases. Instructions for doing this vary from host to host, so you’ll want to contact your previous host for assistance with this.
In case your old host offers phpMyAdmin like us, here is a link to a helpful article that covers How to Export a Database using phpMyAdmin.
Also, here is a link to an article that shows you how to Backup / Export a Database from SSH.
Upload your Website Files and Import your Databases
In this step, you will want to upload your website files using FTP into your public_html directory on your IndicHosts Hosting account. For further assistance with this, reference the “Getting Started Guide: FTP” link mentioned above.
If your website has a database, now is the time to import it to your IndicHosts.net Hosting Account. You’ll first want to create the databases within cPanel, and then import your database backup using phpMyAdmin. For further assistance with these steps, please see:
Creating, Importing, and Exporting MySQL Databases
Test your Website
After you’ve uploaded your website files and restored your databases (if applicable), your next step will be to test your website. You can test your website using your account’s temporary URL. To find your temporary URL, please see Testing your website using your Temporary URL for further assistance. If testing through the temporary url will not work for your site (some CMS applications do not work proPERLy through the temporary url) you can edit your hosts file instead.
Setup your Email
If you have email addresses for your domain, such as [email protected], now is the time to set them up. For more help with creating and configuring your email accounts, please see the following link:
Getting Started Guide: Email
If you currently point your email (MX records) to a third party email service such as Google, you’ll need to update the MX records in your IndicHosts.net Hosting cPanel and ensure “remote mail exchange” is set. No email accounts need to be created on our servers as they reside on the third party providers servers. Please see our article on modifying MX records in cPanel for more information.
If you are using a third party spam filtering service that still delivers emails to our server, such as Postini, you’ll need to create those email accounts on our servers.
You can migrate the current emails from your previous host to our servers. Please see our guide on moving over the existing emails you currently have.
Point your Domain
After you’ve migrated your website to your IndicHosts.net Hosting account and setup your email addresses, you’ll now want to point your domain name away from your previous host and to your IndicHosts Hosting server. This can be accomplished by modifying your domain’s nameservers with your current registrar to:
pdns.indichosts.net
sdns.indichosts.net
tdns.indichosts.net
edns.indichosts.net
For more help with this, please see our DNS Modification Tutorial.
Test your Website Again
When you update your nameservers, it may take up to 24 hours before the new changes begin to take affect. We recommend that you test your website right after the nameserver change, and then again every 6 – 12 hours until 24 hours has elapsed since you initially updated your nameservers.
The IndicHosts.net Technical Support Department is available 24 hours a day, 7 days a week. If you need any assistance with the steps above, feel free to contact us at any time.
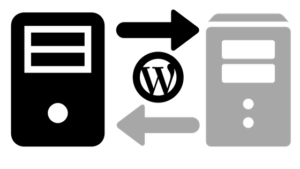
Move WordPress TO IndicHosts Hosting
How to move WordPress to a new server?
If you already have WordPress installed on a server, and would just like to move it to another server this can be accomplished easily as well.
The benefit of doing a full WordPress migration from one server to another is that it brings over everything you’ve done in WordPress up to this point, including Plugins, Themes, and Widgets.
Download WordPress site content from old server
When migrating a WordPress site to a new server, first save all of the current content from the previous server:
- Using FTP, connect to your WordPress site on your old server
Download all files in your document root directory, typically /public_html to your local computer. - If WordPress is installed to a folder like /WordPress? Just download that folder instead.
Download WordPress database backup
With the WordPress files saved to your computer, next you need a copy of your WordPress database. You want to export your WordPress database with phpMyAdmin
Create MySQL database on new server for WordPress
Since you’ve got the WordPress database backed up, the next step is creating a new database to import that into.
Create a MySQL database on the new server
Take note of the Database name, Database user, and Database password you’ve set In this example here is what I wrote down:
- Database name: example_wrdp1
- Database user: example_wrdp1
- Database pass: myDBpassword
Modify downloaded wp-configuration.php file with new database
Before uploading your WordPress files to the new server, you need to adjust your wp-configuration.php file with the new settings.
From the WordPress files you downloaded, open up the wp-configuration.php file with a text editor.
You will want to modify the highlighted code with the new server’s database info you took note of:
/** The name of the database for WordPress */
define(‘DB_NAME’, ‘userna5_wp12’); /** MySQL database username */ define(‘DB_USER’, ‘userna5_wp12’); /** MySQL database password */ define(‘DB_PASSWORD’, ‘FGdgA%#5’); /** MySQL hostname */ define(‘DB_HOST’, ‘mysql.example.com’);
So for our example we end up with:
/** The name of the database for WordPress */
define(‘DB_NAME’, ‘example_wrdp1’); /** MySQL database username */ define(‘DB_USER’, ‘example_wrdp1’); /** MySQL database password */ define(‘DB_PASSWORD’, ‘myDBpassword’); /** MySQL hostname */ define(‘DB_HOST’, ‘localhost’);
It’s important to point out that the DB_HOST might have been a hostname previously on your old server. Typically if you’re migrating WordPress to a server where they MySQL server and website are on the same server, you can just use localhost to let WordPress know to look locally for the database.
Upload WordPress files to new server
Now that your wp-configuration.php file is adjusted for the new server, upload all your files there.
Using FTP upload your downloaded WordPress files to the new server
If you’ve installed WordPress to a folder like /WordPress, make sure to upload the files there.
Import WordPress database backup to new server
The last step in a WordPress migration to a new server is importing the WordPress database backup to the server
Import your WordPress database using phpMyAdmin
Finished moving WordPress to new server
You should now have successfully migrated your WordPress site from one server to another!
You might want to login to your WordPress dashboard to ensure everything is working now on the new server.